Tuesday, November 23, 2010

Animation update

I just bought Dept 56 Father Christmas' Journey. I love this figure.

I did get the  little motors in my styrofoam base. But with Thankgiving coming I'm cooking. So hopefully after Thanksgiving I'll get to finish it. LOL
 Here is the top section with the circular animation. Now I have to figure out what kind of cover to use so the figures have a firm base to stand on. It still sticks up a little too far.
This is underneath the market base.

Wednesday, November 17, 2010

A Christmas Carol animation project.

I know I'm crazy but I'm going to try to add some animation to my  Christmas Carol village this year.

Last year I came up with a way to animate the scrooge's graveyard but it is bulky. Last year at Micheals I bought this Castle at 90% off about 12.00. It's a cute castle but I don't do vampires in my Halloween sets. I do think that I can use this castle for my pirate village with some modifications but that's for next year.
Of course this vampire castle doesn't work right the sound track is really draggy and the vampire that is supposed to pop out of the top only comes out every now and then.
What is working perfect is the circular wheel that makes the vampire(who is broken at the feet and glued back chase the girl.
If your wondering why I'm removing the little motors from this piece it's because it's actually cheaper to do this with a discounted House. The little motors cost 8 to 10.00 and the mini LED lights are just a few dollars, the gears and gearboxes are also a separate cost. But this way I have all that without having to put it together myself.
 Here is the circular piece I want for the shoppers. That's one motor. There is another one on the vampire that jumps up and down. I have to take some of the plastic off these cause I want them to be flat for the shoppers base.


 This is the circuit board that runs the lights and servos and sound I cut the wires to the speaker cause I don't want Dracula talking at christmas! LOL But when I cut those wires my on switch quite working. I'll figure that out later everything still comes on so I can just unplug it to turn it off.

 The plastic brace under my thumb has to go.The little silver motor will make another figure move.
 Here is everything taken off the castle I have about 6 or 7 LED lights and two motion motors. It's now flat enough to bury in my base.

Saturday, November 13, 2010

Come Fix the Wheel of Horror with me!! HEHE!

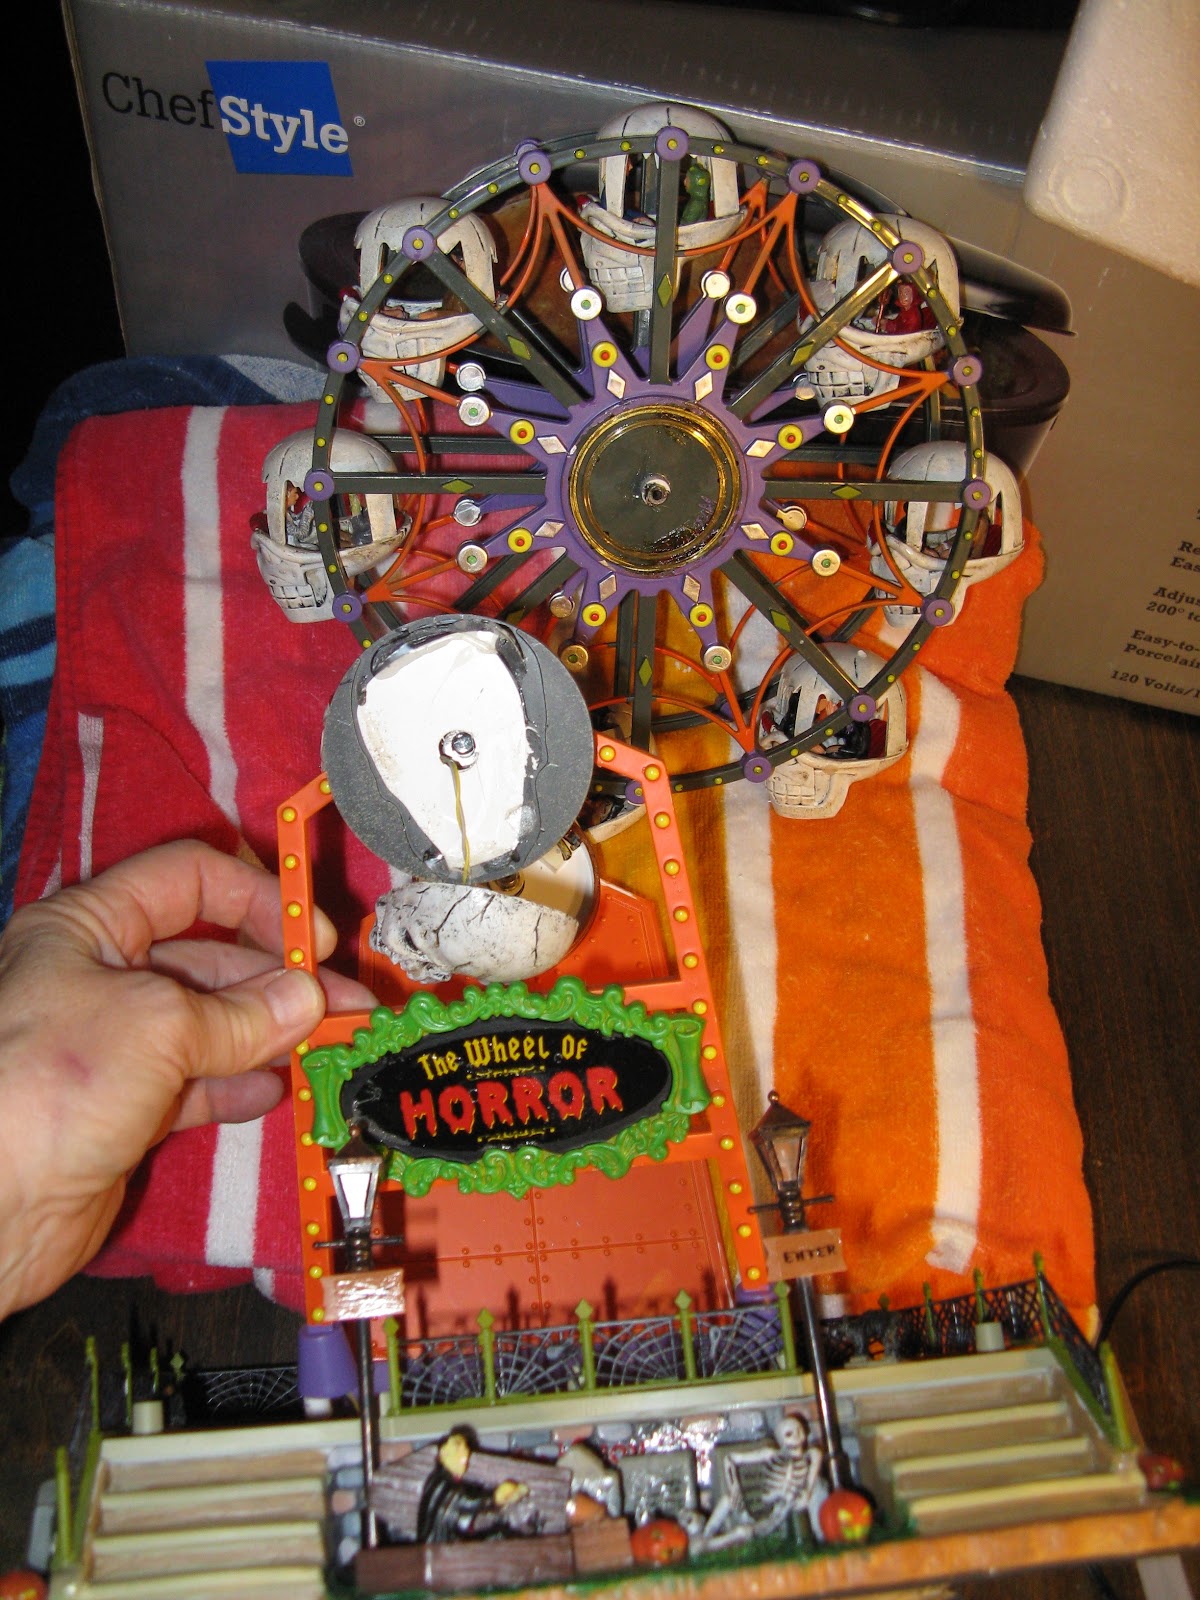
I went to Micheals and found the Wheel of Horror and Grimsley's Green House on the 80% off rack plus I had a 20% off total purchase coupon which expires today. I bought the Wheel of Horror for 19.19 and Grimsley's Greenhouse for 11.19 plus a 4.5 volt adaptor for 3.19.
I knew there had to be something wrong with the Wheel of Horror cause it normally cost 119.00 and nobody had bought it. I have free time today so I took it home. Of course it came on but the wheel wouldn't turn. I could leave it as a table piece cause it would light up and the sound worked but that's not as much fun as watching it turn. So I decided to take it apart and fix it. If nothing else I could use the parts for other things if I mess it up badly. LOL
  The first thing I did was to turn off the sound but leave it running so I could hear which side of the wheel the gears where turning. It was the thich orange side at the back of the ride.
I had to peel some of felt Lemax puts on the bottom off and I cut around the rest to try to save some of it.
Remove 4 little screws holding the bottom plastic on. Be very careful if you ever do this cause all the LED light wires are there and very fragile.
Now I had to find where the little motor is that turns the wheel and if maybe it runs on a pulley or gear.
I took off the next little plastic plate.


With the other plate off I had to push those little circles to get the legs of the top wheel brace to come loose.


I had to pyre off the skull it was only attached with hot glue but it had wire attached for the eyes. There is a long screw inside that attaches the front brace to the back. Once that was out the wheel came right off.


Now I looked at the little nut that turns the wheel. I plugged it in and it turned.

So I looked at the wheel where it fitted on the nut. It was stripped out and had bits of plastic stuck in it.

This was all I could come up with to tighten the nut up. I thought about hot glue but I thought the friction from the wheel might get it too warm. So I cut some tiny strips of electrical tape and wound them around the nut. I did this three times. Then put it back together.

The only casualty was this little cat I knocked off his  tail! LOL Now I need the hot glue.


All back together plugged in and it works!!!!!!!!!!!!!!!!!!!!!!!!!!!!!!!!!!
Here's a link to the you tube of it working.
http://www.youtube.com/watch?v=ODTmxIII_XM

Friday, October 22, 2010

Walgreen's Halloween figure remake


Most villagers don't buy Walgreens Halloween figures because of the bad paint job the cmpany does on them. Now that they are retired and Walgreens doesn't carry them any more they are showing up on e-bay. I like them I have collected about dozen or so. But I only collect the trick or treaters not the monsters.


These two figures are from Walgreens, the witch and the bat girl on the right I've already painted. They used to look like the figure on the left just minus the kid in the middle.
 As you can see the orange witch really stands out now that she has been repainted. I watched Hocus Pocus last night and Danny's witch costume was the inspiration for her coloring. LOL
Here is a close up of the bat girl much better color but her eyes I still need to work on. LOL I used a toothpick to dot them but it still isn't small enough maybe a pin?

I decided that I wanted two seperate figures for this figurine. I'm going to keep the other one together. I used a Dremel tool with a diamond cutting disc to seperate them. Then sanded down the edges with the same disc.
Now I just paint I had to use two shades of green to match the grass on the front. I also cut off the fence it just look wrong.
Now I have two new figures! I'm happy with this project. I'm going to work on the others this winter.

Thursday, October 14, 2010

Backwards Candy Corn

I've been watching all the wonderful Halloween Ornaments that have been made and really wanted to try to make my own.

I love how these came out till I really just sat and looked at them. Something was wrong. I went to my computer and googled candy corn under pictures. Wow I painted the candy corn colors on the wrong ends. White is supposed to be on top and yellow on bottom. But I think I like them this way! LOL


Tuesday, October 5, 2010

Bumpy Pumpkins

I finished my first Bumpy Pumpkin. He is just my practice doll. 

I did learn alot about mixing mediums like papermache, wood and paperclay. Making an armature using foil and wire which I had problems with on the tiny details like fingers. One of his fingers cracked. I think I have a better solution on the next one.
Here I was trying a way to make his cloths fit his body and seal them but forgot to put the words on his shirt right side up! LOL

His running buddy for trick or treating I'm happy with, right down to his scary cat candy bucket.
Also the candy container needed to be bigger. Learning proportions is going to be a challenge for me!
Two of his four hands are holding up his cloths. I guess human cloths don't fit pumpkin vines well. LOL You can see his cracked finger on his hand
I'm pleased with his tennis shoes, and the lawn he dropped his candy on.


All in all I had fun using so many different art mediums to make him. I'm starting my next one in a few days.

Monday, September 27, 2010

Road House Blues


This one was fun. The roads didn't come out quite right. The moss mat just wouldn't let them stick well. I"m not an artist either painting a background isn't my strong suite!!! LOL